Share a project
This article assumes that you have already created a project and have an event in it.
As a Project Owner you are able to manage who else has access to that project and who can collaborate with you on it.
Before you invite people to collaborate with you, they will first need to be a member of your Organisation. You may need to contact an administrator to add others to your Organisation.
Inviting your team mates
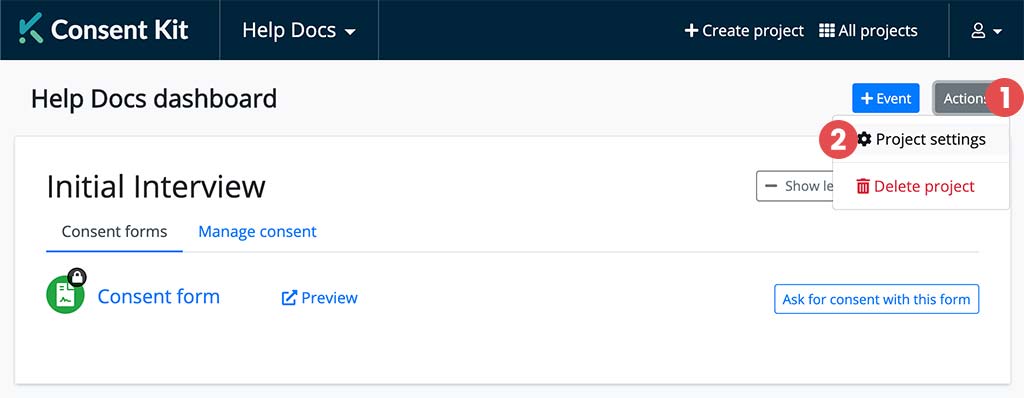
From the Project Dashboard, click on the “Actions” drop down in the top right corner of the screen (1) and select “Project Settings” (2).
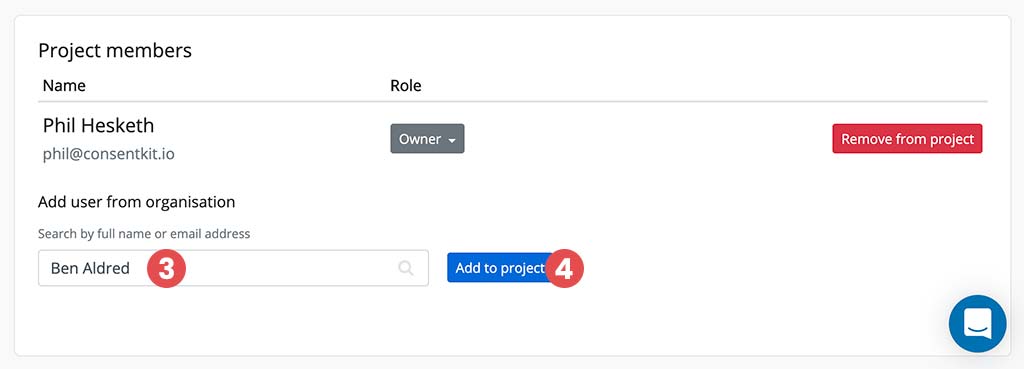
Within Project Settings, scroll down to the section called “Project members”. Click on the text input (3) and search for the person you want to add. You can use their name or their email address. Remember that they will need to be in your Organisation already to share a project with them.
Select the person from the autocomplete drop down and click the “Add to project” button (4).
You just added someone to your project!
Project permissions
By default, anyone you invite to a project will become a member of that project. Being a member means that they can view the project, create events and consent forms and ask people for consent.
Changing permissions
To give your new collaborator additional permissions, such as editing the project itself, deleting participants or inviting more people to collaborate, you need to change their role in the project.

From the Project Members section within Project Settings, click on the “Role” drop down (5) next to the Collaborator’s name.
Select the role you want to assign them.
That person now has new found powers within the scope of this project!
Get help
Can't find what you are looking for?